

Save Time Upon Arrival With Visit Japan Web
This service allows travelers to complete immigration, customs, and quarantine procedures before arriving in the country. By registering your information in advance, you can reduce wait times at the airport and enjoy a smoother arrival experience, and bypass lengthy queues!
Step 1: Access the Visit Japan Web
- Open your preferred web browser (Chrome, Safari, Firefox, etc.).
- Navigate to the official Visit Japan Web page.
- You can find it by searching for "Visit Japan Web" or using this direct link: Visit Japan Web Official Site.
- Bookmark the website for easy access in the future, especially if you frequently travel to Japan.

Step 2: Create an Account


To use the Visit Japan Web system, you first need to create an account.
- Click on "Sign Up" on the homepage.
- Enter your email address and create a secure password that is at least 8 characters long and includes a mix of letters, numbers, and special characters.
- Submit your registration form.
- Check your email inbox for a verification email.
- Click the verification link within the email to activate your account.
- If you don’t receive the email within a few minutes, check your spam or junk folder.
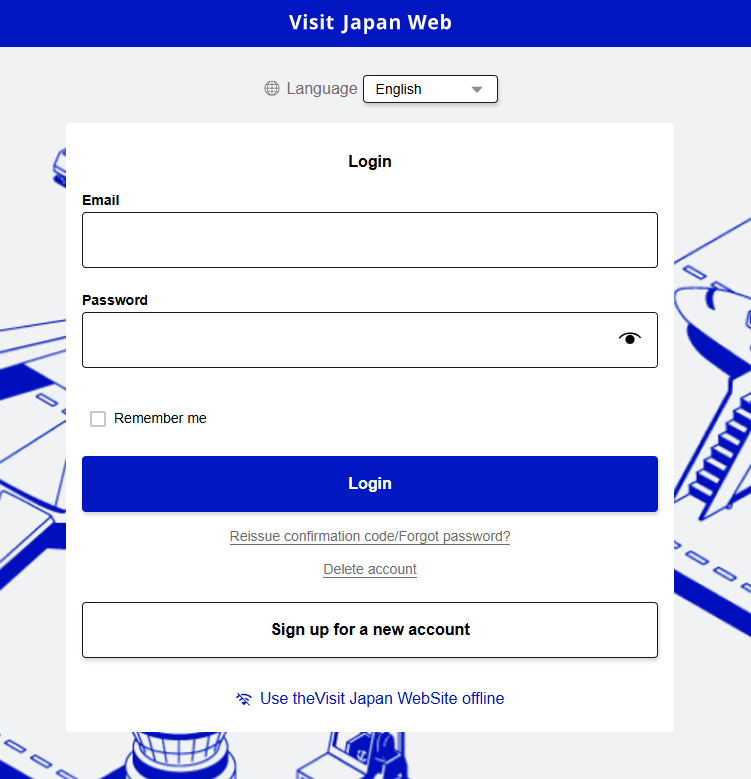
Step 3: Log In to Your Account

Once your account is verified:
- Return to the Visit Japan Web page.
- Click on "Log In" at the top right corner of the homepage.
- Enter your registered email address and password.
- Click "Log In" to access your personalized dashboard.
Step 4: Add Traveler Information


You need to input personal information for each traveler.
- On the dashboard, select "Add New User".
- Enter the following details accurately:
- Full Name (as it appears on your passport)
- Passport Number
- Nationality
- Date of Birth
- Gender
- Home Address
- Double-check all information to ensure it matches your travel documents.
- Save the traveler profile by clicking "Submit" or "Save".
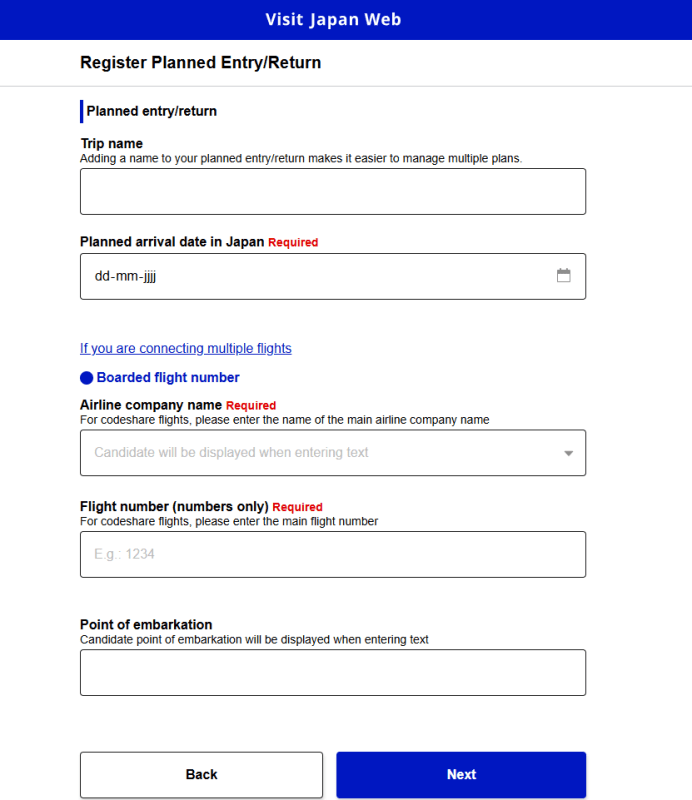
Step 5: Register a Trip
Once your personal details are added, you can register your travel information.
- From the dashboard, click on "Register Planned Entry/Return".
- Provide the following travel details:
- Arrival Date (the date you plan to enter Japan)
- Flight Number (for air travel) or Vessel Name (for sea travel)
- Entry Airport/Port (select from the list of Japanese entry points)
- Accommodation Information (address of the hotel, Airbnb, or residence where you will stay)
- Emergency Contact Information (if required)
- After completing the form, click "Submit".
- Your trip information will now be saved under your profile.


Step 6: Complete Required Forms

Depending on your trip, you may need to fill out additional forms:
- Immigration Declaration
- Click "Immigration Declaration" on your dashboard.
- Answer questions about:
a. The purpose of your visit (tourism, business, family, etc)
b. Your intended length of stay in Japan.
c. Previous travel history or any visa requirements.
- Customs Declaration
- Click "Customs Declaration" and fill in the required fields.
- Declare any items you are bringing into Japan, such as:
a. Duty-free goods
b. Currency exceeding 1,000,000 yen
c. Prohibited or restricted items like food, plants, or animals - Be honest in your declarations to avoid issues at customs.
- Health Declaration (If Applicable)
- If health checks are required (e.g., during COVID-19 or other health emergencies):
- Click on "Health Declaration".
- Provide information about:
a. Your COVID-19 vaccination status, any recent illness or symptoms, or any recent contact with individuals with contagious diseases
Step 7: Submit and Review
- After filling out all the required forms, click "Submit" for each section.
- Carefully review the confirmation page that appears after submission.
- Make sure all information is accurate. If any details are incorrect, go back and edit the form before proceeding.

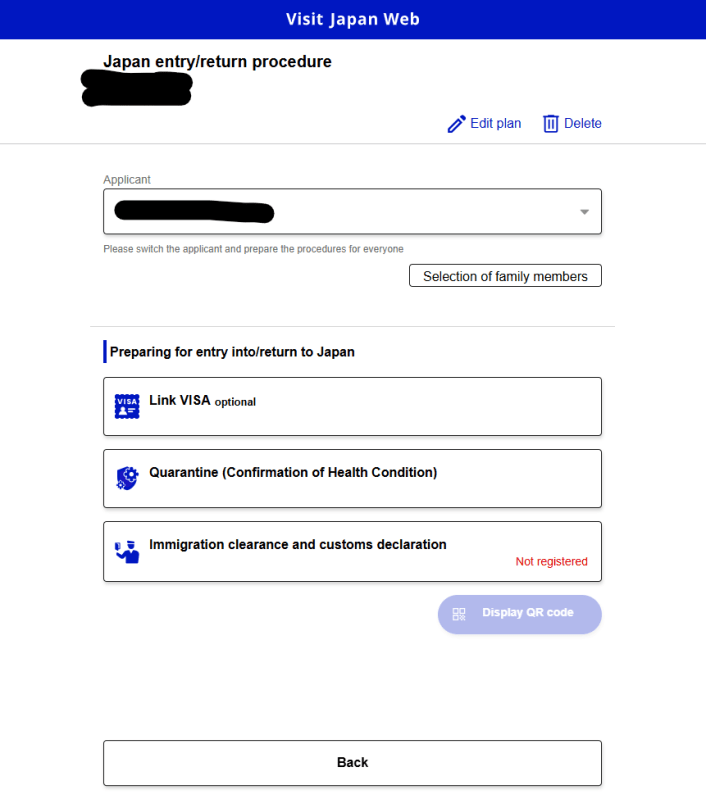
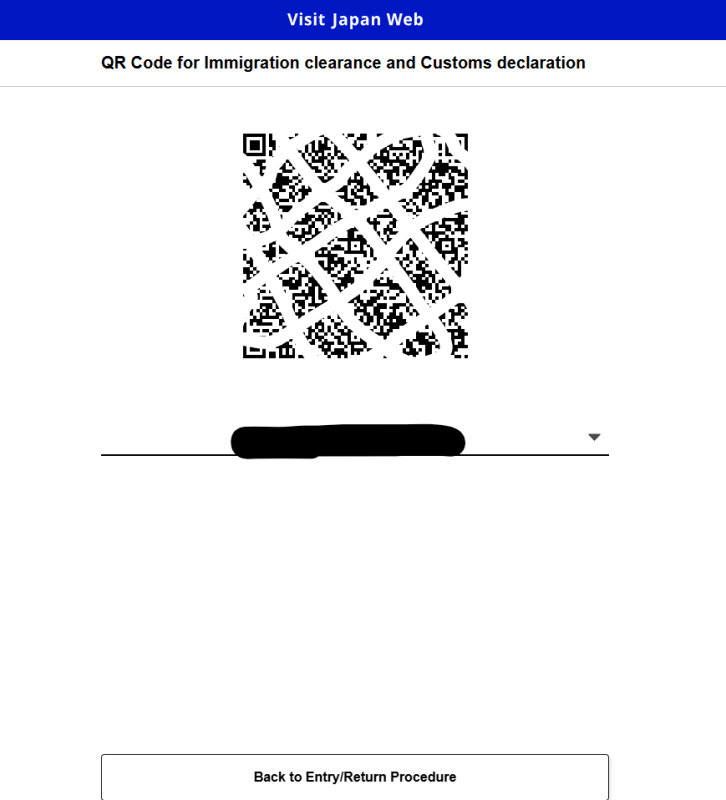
Step 8: Obtain Your QR Codes


Once the forms are successfully submitted, the system will generate QR codes for: Immigration, Customs, Health Declaration (if applicable)
- To access your QR codes:
- Go to the "My Page" section of the dashboard.
- Each QR code will be displayed with a description of its purpose.
- Download or screenshot the QR codes to your mobile device.
- You can also print the QR codes as a backup in case your phone battery dies or you encounter technical issues.
Step 9: Use the QR Codes Upon Arrival
When you arrive in Japan:
- At Immigration:
- Present your Immigration QR Code at the immigration checkpoint.
- Be ready to show your passport and visa (if applicable).
- At Customs:
- Present your Customs QR Code at the customs counter.
- Declare any items you are bringing into the country.
- At Health Checkpoints (if applicable):
- Show your Health Declaration QR Code and any required vaccination certificates or test results.
Using these QR codes will help expedite your entry process, reducing waiting times and ensuring a smooth arrival experience.
For more details, visit the official guide.